
Inspiration and Prototype Research
Restoring & Upgrading a Proto 2000 SW900 – The KNR 90 Rebuild : Tear Down
Table of Contents
While exploring rail lines on Google Earth, I stumbled across KNR 90, a hidden SW900 switcher that inspired this rebuild. In this post, I start tearing down a Proto 2000 SW900, sharing tips, lessons learned, and the first steps toward transforming it into a modernized KNR 90.
Restoring & Upgrading a Proto 2000 SW900 – The KNR 90 Rebuild : Tear Down
Funny thing, I didn’t even know the KNR 90 existed until just a few months ago. I was doing what I like to call remote railfanning—basically using Google Earth to follow rail lines out of curiosity. I started poking around, tracing how trains from Morehead City make their way inland, and I noticed this little spur line near Kinston. Naturally, I followed it, and it led me straight into the North Carolina Global TransPark. Zooming in on the satellite view, I spotted a lone engine. I switched to street view, and there it was: KNR 90, sitting quietly in the yard. I had no idea there was a switcher still working this line—and to top it off, it was an SW900 in what looked like Carolina Blue. Right then, I knew it would make for a fun project.
The Tear Down Begins
Alright, let’s get into the tear down. I’ll be honest—I didn’t take as many photos of the process as I should have. Lesson learned! Next time I’ll document it properly, maybe even on video. In fact, if you want to follow along with future builds and see more behind-the-scenes stuff, sign up for my newsletter so you don’t miss it.
Disassembly
Removing the body from the chassis is pretty straightforward once you remove the couplers. The Proto 2000 SW900 comes apart into three main sections:
- The main body
- The cab
- The walkways
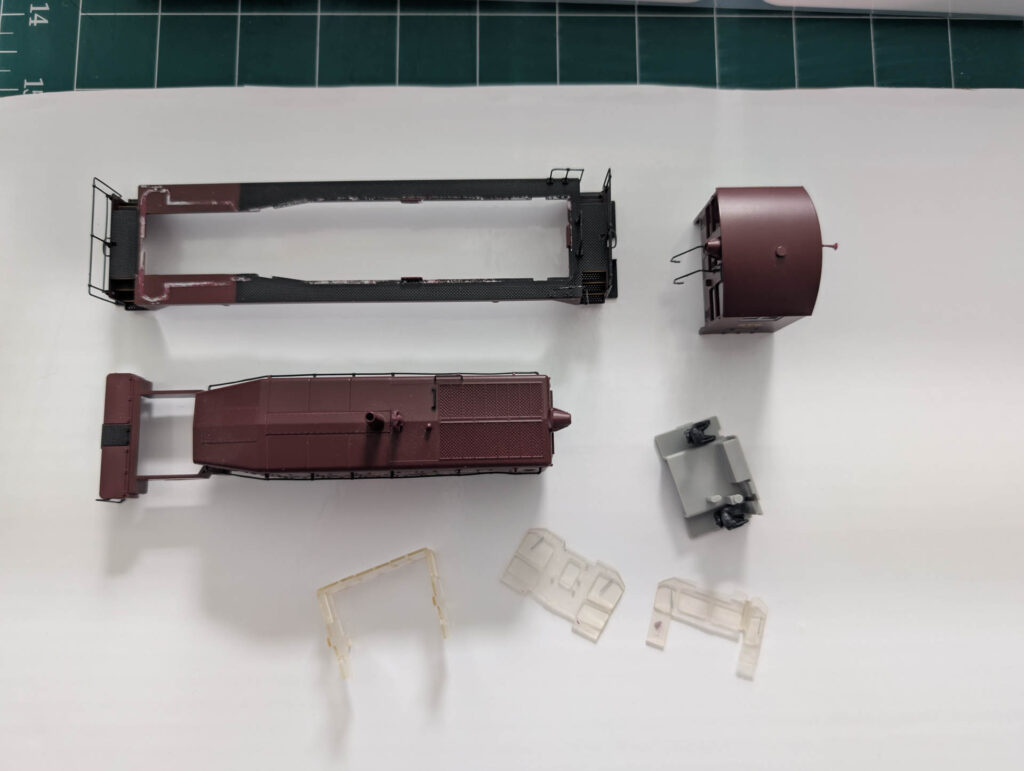
From the cab, I carefully removed the plastic window inserts since I didn’t want them going through the paint removal process. These parts can be fragile, so take your time with them.
Staying Organized
Here’s a tip: invest in a good multi-layered storage box with compartments. I use one to keep all the parts organized and safe during the rebuild. Nothing kills progress faster than losing a tiny part halfway through.
Prepping for Modifications
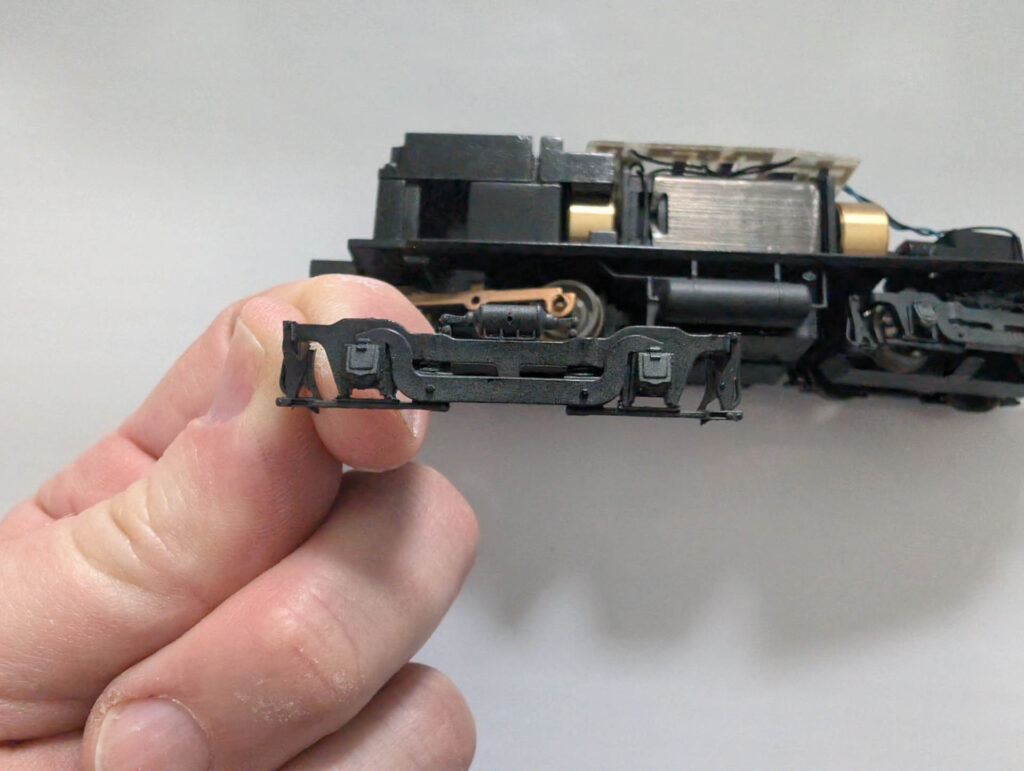
The side trucks are easily removable as well. I took one off specifically to take measurements. I’ll be making and swapping out the friction-bearing trucks for roller-bearing ones to match KNR 90’s modernized look. This is a small but important detail, especially for short lines that often update their older locomotives with more modern equipment.
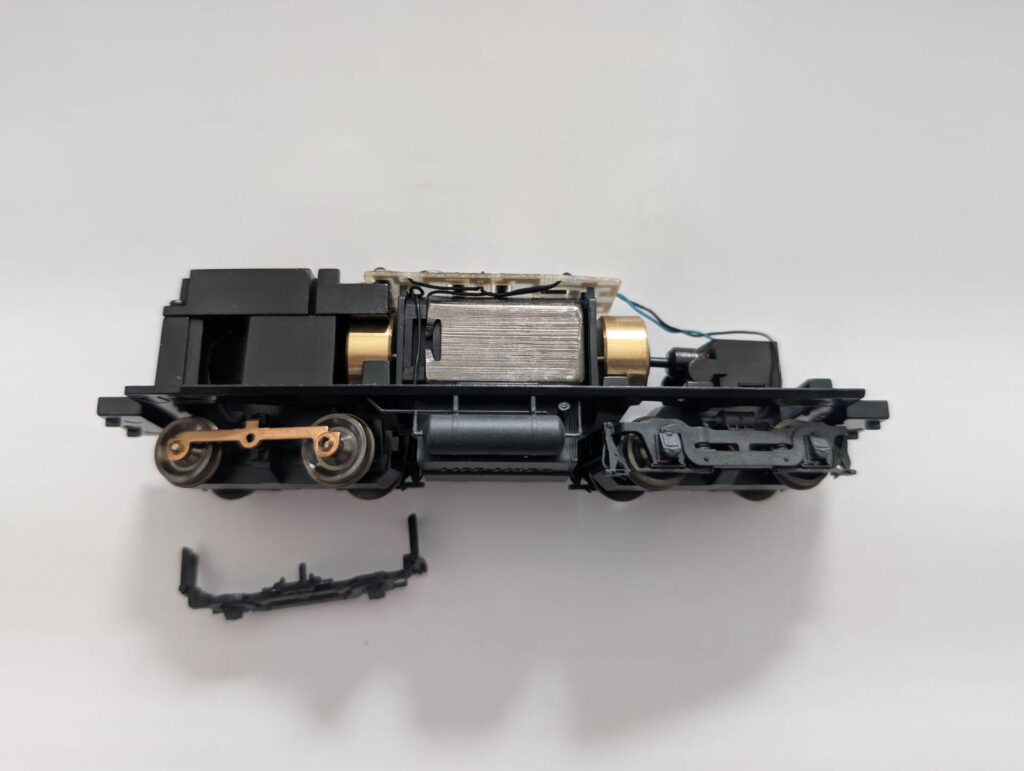
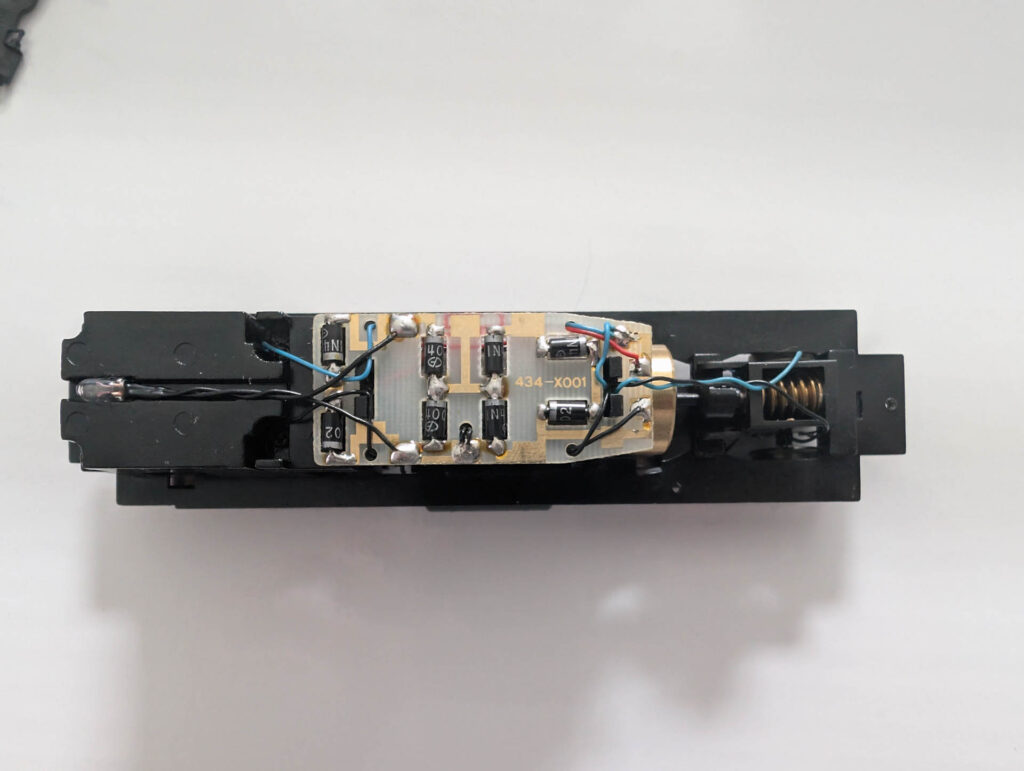
Finally, you can see the top of the chassis with its factory PCB still installed. This will all be coming out and getting replaced with a proper DCC decoder, and I’ll be converting the lighting to LEDs for improved performance and appearance.
What’s Next?
Next up, we’ll be stripping the factory paint. Doing this will not only get the model ready for the KNR 90 paint scheme, but it will also make removing the handrails and fine details much easier without risking damage.
Stay tuned for the next step in bringing this little switcher back to life.
Articles in This Series
- Restoring & Upgrading a Proto 2000 SW900 – The KNR 90 Rebuild : Overview
- Restoring & Upgrading a Proto 2000 SW900 – The KNR 90 Rebuild : History
- Restoring & Upgrading a Proto 2000 SW900 – The KNR 90 Rebuild : Tear Down
- Restoring & Upgrading a Proto 2000 SW900 – The KNR 90 Rebuild : Paint Removal
- Restoring & Upgrading a Proto 2000 SW900 – The KNR 90 Rebuild : AAR Type A Trucks Replacement
- Restoring & Upgrading a Proto 2000 SW900 – The KNR 90 Rebuild : DCC Decoder Install
- Restoring and Upgrading a Proto 2000 SW900 – The KNR 90 Rebuild – Painting
- Restoring & Upgrading a Proto 2000 SW900 — The KNR 90 Rebuild: Final Wiring and Ditch Lights