
Inspiration and Prototype Research
Restoring & Upgrading a Proto 2000 SW900 — The KNR 90 Rebuild: Final Wiring and Ditch Lights
Table of Contents
Final wiring is done and ditch lights are in! In this phase of the KNR 90 rebuild, I wrap up the electrical work and share a few thoughts for those getting started with model upgrades. A few simple tools, some patience, and a steady hand—that’s all it takes to bring your models to life.
Restoring & Upgrading a Proto 2000 SW900 — The KNR 90 Rebuild: Final Wiring and Ditch Lights
I didn’t take a lot of photos this time around, but the work still got done—and that’s what counts. If you’ve been following along on the KNR 90 Rebuild, this post marks the home stretch on the electrical side of things. From bus resistors to ditch lights, here’s a quick look at what I did, how it came together, and why sometimes less documentation means more time hands-on. If you’re just getting into upgrading your models, I hope this encourages you to jump in and not overthink it.
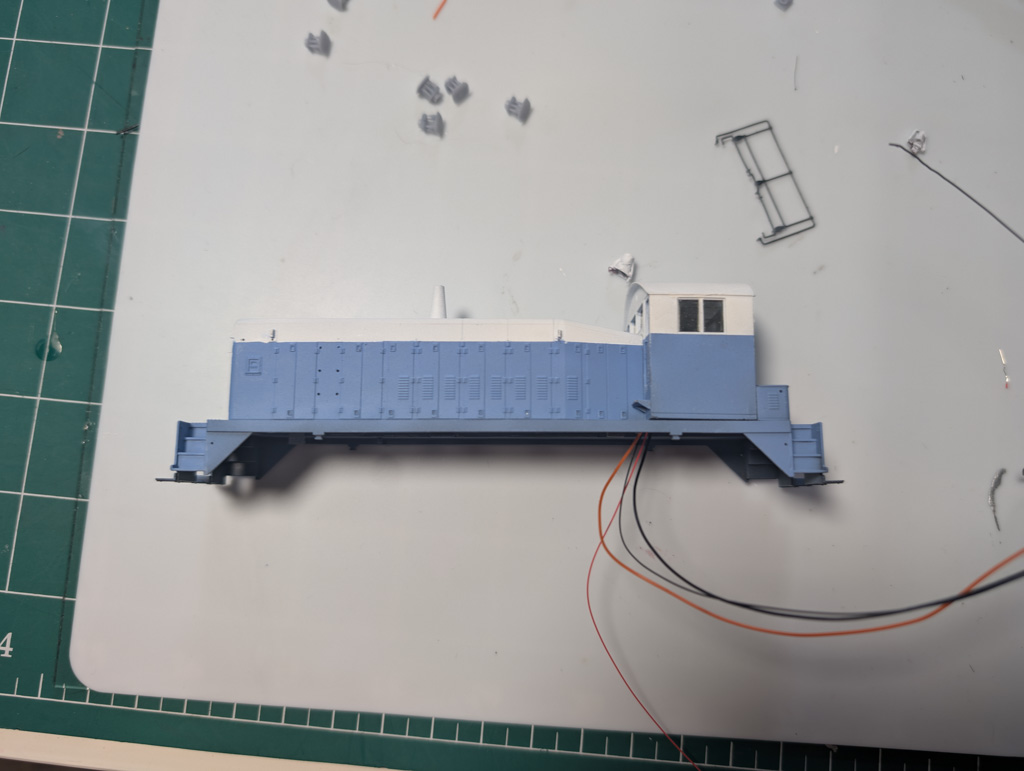
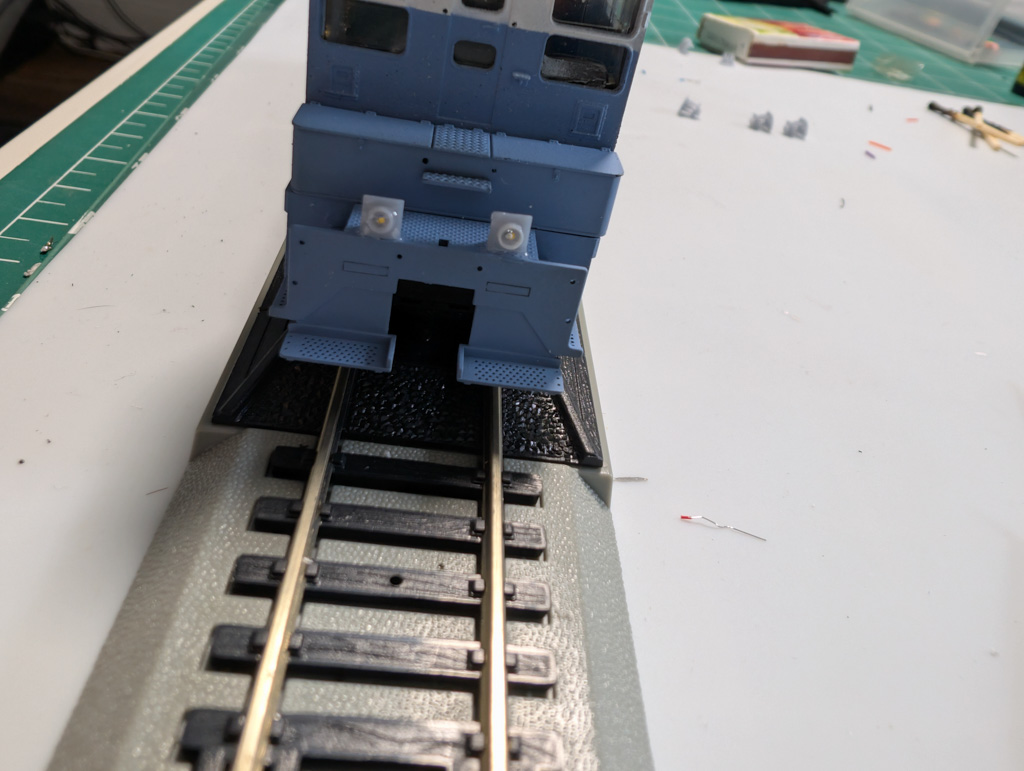
KNR 90 Wiring
I wrapped up the final wiring on KNR 90, and I’ve got to say—this part always takes a little longer than I expect. Not because it’s overly complicated, but because it deserves the time. Getting the wiring right means the whole model runs smoother and looks better in the long run.
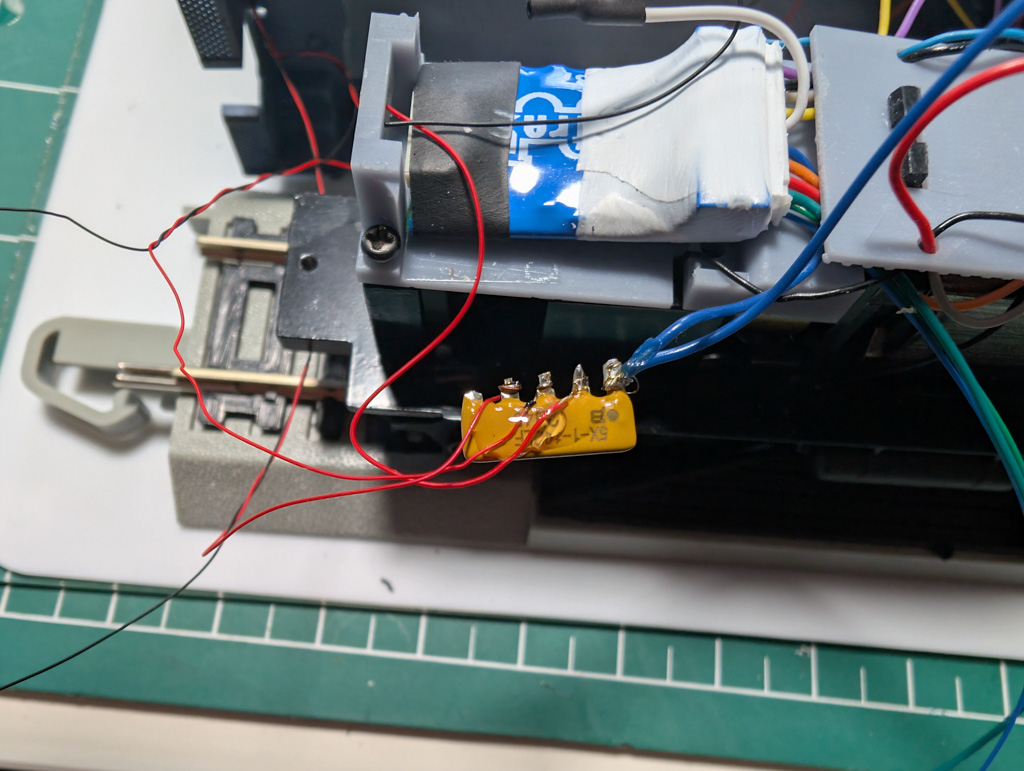
I used a small bus resistor in this build, and once I had it in place, I secured everything with UV glue. It’s one of those tools I didn’t use much in the beginning, but now I reach for it all the time. After fixing the wires in position, I gave the whole thing a wrap to make sure nothing shifts or shorts out. It’s not flashy, but it works—and that’s the whole point.
Ditch Lights
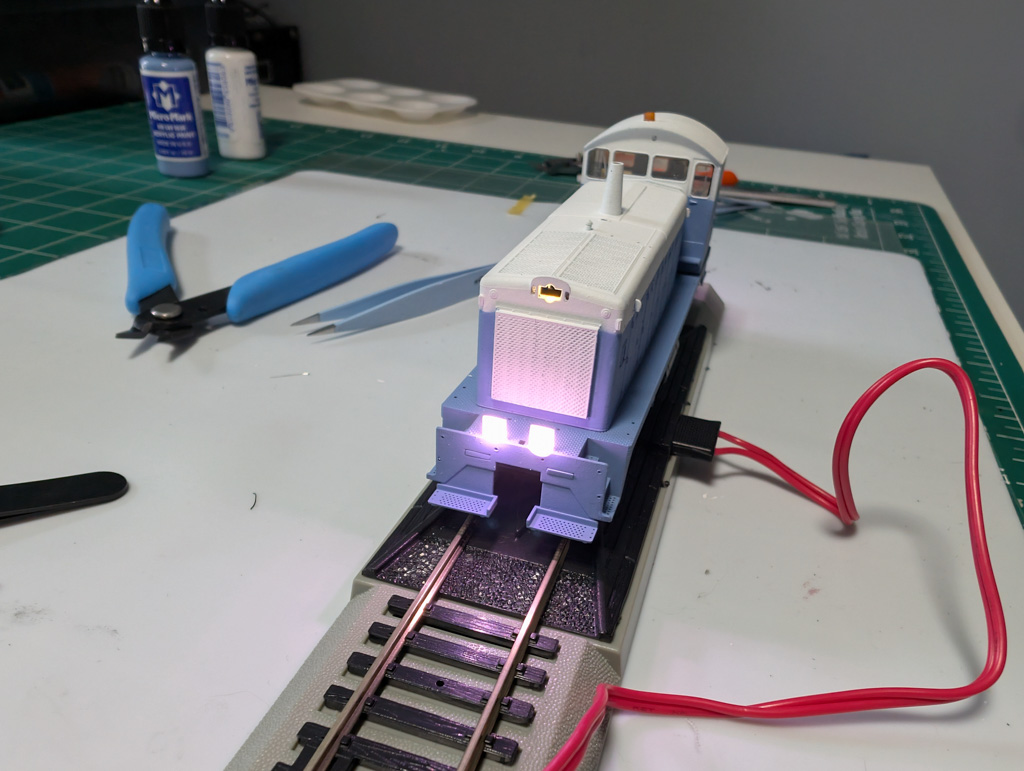
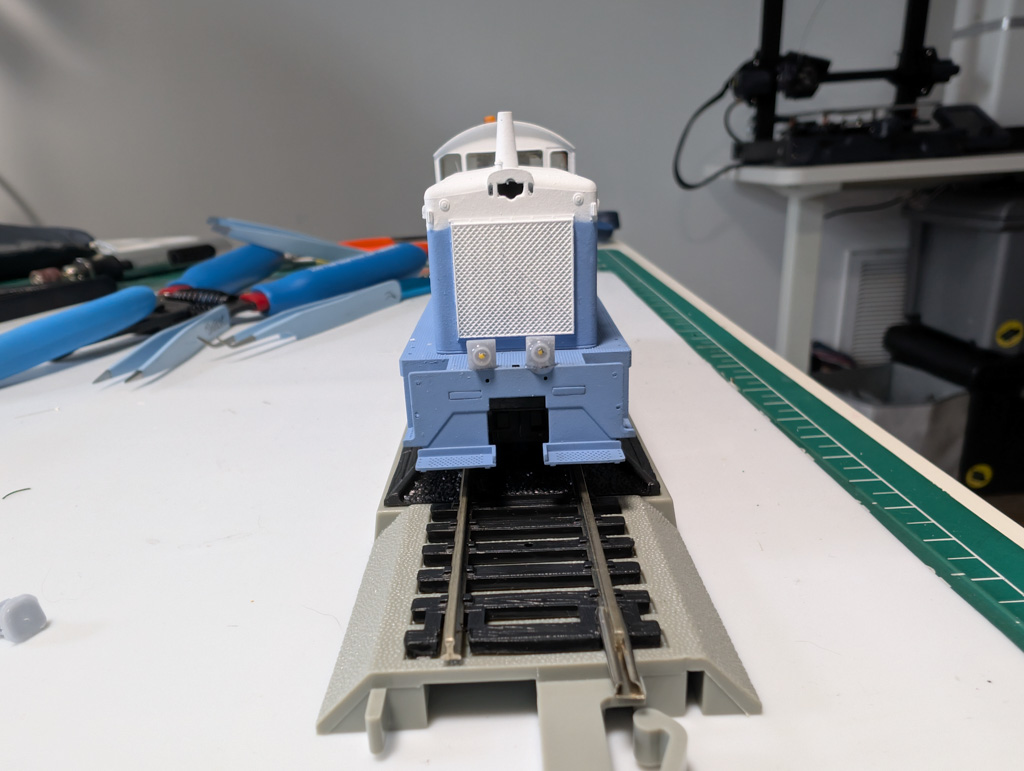
Now, the ditch lights—those were a fun little side project. I designed and 3D printed the housings myself. For the lenses, I went with clear UV glue again. After placing the LEDs inside the housings, I added just a bit more UV glue to fill the recessed area and cured it with a UV light. Simple, effective, and looks great once it’s all lit up.
I did get them a little too close on the front. Adds character.

Something I Have Learned
If you’re just starting out, here’s something I’ve learned: it doesn’t have to be perfect right away. The more you build, the more comfortable you’ll get. Be patient with yourself. Take your time. Wiring, lighting, printing—it all gets easier with practice. And the coolest part? Every time you finish something, you’ve got a little more experience under your belt and a model that feels even more yours.
What’s Next For The KNR90?
Next up for KNR 90: I’m designing new side railings, along with front and rear railings to match. That’ll tie everything together and really complete the look. Stay tuned—more to come. Getting close to the end.
Articles in This Series
- Restoring & Upgrading a Proto 2000 SW900 – The KNR 90 Rebuild : Overview
- Restoring & Upgrading a Proto 2000 SW900 – The KNR 90 Rebuild : History
- Restoring & Upgrading a Proto 2000 SW900 – The KNR 90 Rebuild : Tear Down
- Restoring & Upgrading a Proto 2000 SW900 – The KNR 90 Rebuild : Paint Removal
- Restoring & Upgrading a Proto 2000 SW900 – The KNR 90 Rebuild : AAR Type A Trucks Replacement
- Restoring & Upgrading a Proto 2000 SW900 – The KNR 90 Rebuild : DCC Decoder Install
- Restoring and Upgrading a Proto 2000 SW900 – The KNR 90 Rebuild – Painting
- Restoring & Upgrading a Proto 2000 SW900 — The KNR 90 Rebuild: Final Wiring and Ditch Lights